Categories
Frozen Desserts and Sweet Sauces The Book

190. Strawberry Cheesecake Ice Cream p.855


The recipe

This is ice cream for the lazy, if you have an ice cream maker you can get this cheesecake version will only take up about 20 minutes of your time. There’s also less decision making to do. For regular ice cream you make a custard and heat it until it just coats a spoon, about 170 degrees. This can be a bit of a trick if you’re rotten with a thermometer, or don’t know what nappé is supposed to look like. This ice cream does away with all that, it’s just chopped strawberries, cream cheese, sugar, milk, lemon juice, a pinch of salt, which go for a spin in the blender. You then stir in heavy cream, and chill the whole mixture. Once it’s cold you add it to the ice cream maker, churn it, then pop it in the freezer for a couple of hours to firm up.

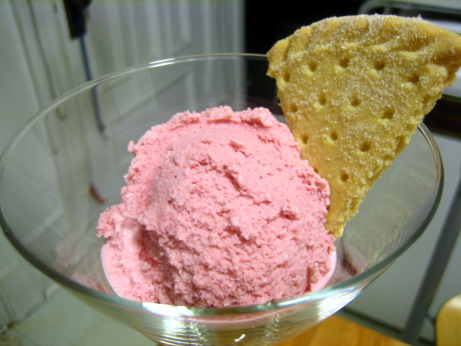
The Good: This ice cream tastes like strawberry cheesecake, only colder. The cream cheese added richness and tang to the ice cream, and accounted for a whole lot of the flavour. The strawberries were very present, but just like in strawberry cheesecake they didn’t taste much like strawberries anymore. I’m not sure why that is, but I find that through some alchemy they stop tasting like strawberries and start tasting like strawberry cheesecake somewhere along the way. That is in no way a bad thing, strawberries are great, but so is strawberry cheesecake.

The Bad: This ice cream tastes like strawberry cheesecake, only colder. My dining companion isn’t into strawberry cheesecake, or strawberry desserts in general, I had a lot of this stuff to go through alone. The texture was also a bit off. It was very thick, probably from the cream cheese, and set up quite firmly. I would have preferred a creamier, more yielding ice cream.

I skipped the chilling step after the ingredients are blended together, and went straight to the freezing step. The point of chilling the base is to help it freeze as quickly as possible when it goes into the ice cream maker. Faster freezing means smaller ice crystals, means a smoother creamier texture. It’s possible that my issues with the texture were a result of my shortcut, but I don’t think so. The mouth feel was good, it wasn’t gritty or grainy as ice creams that weren’t frozen quickly enough can get, so I suspect the texture is due to an excess of cream cheese.

The Verdict: It’s ice cream, it tasted good. On an objective – is this something you would eat again?, level the answer is absolutely yes. But, there are only so many ice cream making opportunities in life, and I think my time could be better spent.
Categories
Pies, Tarts, and Pastries The Book

123. Sweet Pastry Dough p.791


The recipe

I should state at the outset that I’m a pastry neophyte. Before I started The Project, I think I’d made two pies in my life. Sure, I baked stuff in pie shells, but I always picked up the Tenderflake pre-made ones, and figured it was good enough. I don’t really have a knack for pastry, but I’m working on it. This is the inaugural entry for the Pies, Tarts, and Pastries chapter of The Book, so hopefully my pastry skills will improve as I work my way through it.

This pie dough is a sweetened and butter based. It gets used in all sorts of other recipes in The Book. I definitely prefer a sweetened dough for dessert pies and tarts. My mother is a rolling pin virtuoso whose pies always turn out perfectly, but she uses the same lard based dough for all her recipes. We have tourtière (a spiced meat pie) every Christmas, which I adore. I particularly like the way the crust is infused with the meaty filling’s flavour. However, when summer comes around and she starts baking up fruit pies using the same dough, I can’t help but imagining the taste of the meat filling along with the crust. Tourtière innards and strawberries aren’t destined to be the next great taste sensation. She recently started adding sugar to her dough for sweet pies, and it made a world of difference. Somehow a little sugar gets rid of the yuletide association, and the pies become pure summer.

The ingredients and method for this dough are pretty standard, combine flour, sugar, and salt, then blend butter in until you’ve got pea sized lumps in a sandy mixture. Then egg yolk and a bit of water are incorporated, until the dough barely holds together. The dough is then divided up, smeared once with your palm, and refrigerated for an hour.

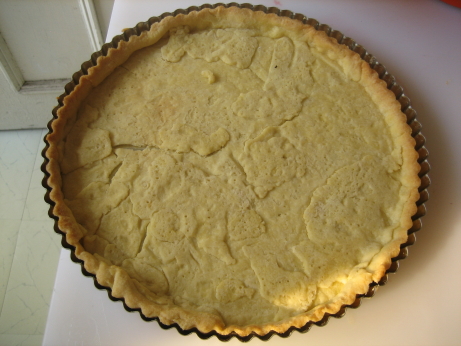
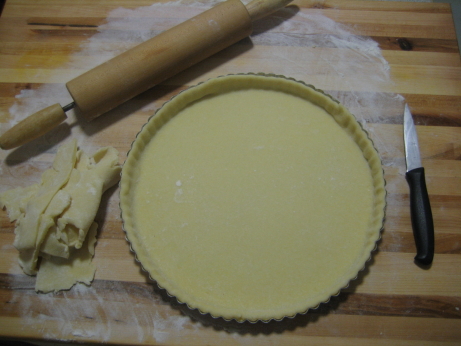
I had some trouble with rolling this dough out. I’ve made it twice, the photo above is the most recent attempt. You can see the scraps to the left, which were probably 40% of the pie dough. I had a really tough time getting it to roll out evenly, and small cracks at the edges developed into big fissures as I was rolling. It was actually fairly easy to work with, and I think my problems were a matter of technique rather than the recipe. The first time I made it was much more of a fiasco though. I made it in late August, on a day with 95% humidity, and it didn’t go so well. Here’s a photo of the crust after baking. 123_sweet_pastry_dough_p791_bad_attempt.jpgYou can see that I had to do a lot of patching before I even got the dough into the oven, and small cracks I’d missed developed into chasms once baked.

The flavour of the dough is excellent, but the texture isn’t ideal. Butter doughs are usually tender, but not flaky. Using a mixture of lard or shortening with butter should give a flavourful dough with great texture. The Book’s Basic Pastry Dough takes this approach (without sugar), and I’m looking forward to trying it. This dough was perfectly fine, it tasted good, and the texture was totally acceptable, but I don’t think it’s the definitive sweet pastry dough. Perhaps as I make and remake it for all the recipes that call for it I’ll get the technique down. For now it’s very serviceable, and I’m content to keep using it.