Categories
Cookies, Bars, and Confections The Book

172. Brown Sugar-Ginger Crisps p.665


The recipe

I made these cookies in the middle of a cookie-baking frenzy, I was buying ingredients for about five different types, with a couple of backup shopping lists in case I couldn’t find all the stuff for the first tier cookies. Somehow the crystallized ginger that this recipe called for never made it into the basket. I discovered this once I was home and ready to start baking, and just not at all interested in going out to hunt down crystallized ginger. I’m an industrious guy, I figured I could crystallize my very own ginger. I looked up a few recipes on the web (The Book doesn’t have one) and it didn’t seem too difficult, although the recipes were very inconsistent. Some called for boiling chopped ginger in a sugar syrup for about 20 minutes, some asked you to boil the ginger in syrup for an hour, let it steep in the sryrup for a day, boil it for another hour, and to repeat this process every day for a week. Since I was interested in using this ginger for cookies that very afternoon I went for a middle ground and chopped the ginger very finely, and boiled it in a concentrated syrup for 2 hours. It was no where near as good as the store bought kind, quite ugly, and very hard, but it basically tasted like candied ginger. No one else was much interested in my crystallized gingers, but they were my little treat, I loved them with a cup of coffee in the afternoon.

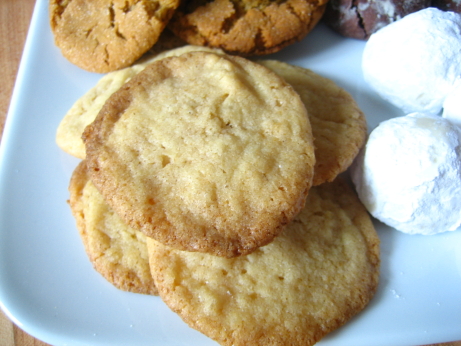
The ginger did a serviceable job in these cookies. They’re a fairly standard cookie base of butter, brown sugar, egg yolk, and vanilla creamed together, crystalized and ground ginger mixed in, and a mixture of flour, baking powder, and salt gently stirred in. They came out as very thin and crisp cookies, studded with the ginger chunks. “Real” crystallized ginger is soft and pliable, whereas my improvised version was quite tough. On the first day they were baked they had a nice crispy exterior with a chewier interior. The recipe says they keep at room temperature for a week, but I found that they lost their crispness overnight. I really would have preferred the chewiness of the professionally produced product in the cookies. Other than that they were nice, they didn’t blow me away, and I probably wouldn’t have asked for a recipe if they’d been served to me, but they were perfectly good.

A strange thing about these ginger cookies is that they weren’t particularly gingery. Beyond the crystallized ginger there’s only 1/4 teaspoon of ground ginger in the recipe. If I made them again I’d up that to 1 teaspoon, many of the Epicurious posters suggest that it improves the cookies dramatically. As written this recipe makes a nice buttery cookie, with a hint of ginger flavour and chewy bites of crystallized ginger. It’s possible that I missed out on what this recipe had to offer with my sub-standard ginger, as they were I liked them well enough, but wouldn’t go out of my way to make them again.
Categories
Pies, Tarts, and Pastries The Book

148. Grasshopper Pie p.772


The recipe

Grasshopper pie was one of the great frustrations of my childhood. It’s a hypnotically enticing green, it’s named after an insect, and it has cookie crumbs in the crust, this is obviously the perfect pie for an eight year old boy. Unfortunately it’s boozy enough to light with a match. My Papa had a fondness for it, and after dinner at big family gatherings my Nana would sometimes bring one out. The adults would sit around laughing, as my uncle would reverently bring a bite to his lips, close his eyes, and make exaggerated moans of pleasure while I looked jealously on. No, no, grasshopper pie isn’t for little boys, there are cookies for you in the kitchen. I could have screamed.

When I got a bit older, I was allowed to try a bite, and much to my dismay, it was foul. Sure it was minty sweet and creamy, but there was something medicinal and disgusting about it. Adults made no sense, alcohol categorically did not taste good, and ruined everything it touched. It was only after a few early experiments with drinking had rewired my brain and set up a pleasant conditioned taste association, that I came around on grasshopper pie. Now, I’m the one faking rapture to make my little cousins jealous.

The pie is easy to make. You start by smashing chocolate wafers into crumbs (get the kids who won’t be eating this pie to help), mix with melted butter, press into a pie pan, and bake. Meanwhile bloom gelatin in cream, add sugar, crème de menthe (green), crème de cacao (clear), and egg yolks. You then whisk this mixture in a double boiler ’till it comes up to 160F, and cool the bowl in an ice bath. Once it’s thickened, fold in whipped cream, and pour the filling into the crust. It then goes into the refrigerator for a few hours, and gets a sprinkling of chocolate just before serving.

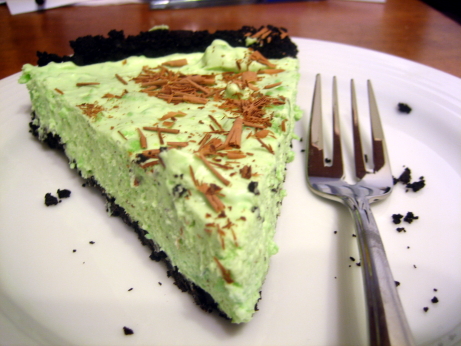
My pie was going very well until I got to the cooling the gelatin mixture in a bowl of ice water step. I decided to save time by multitasking and getting the cream whipping in the stand mixer while I stirred the gelatin mixture in the ice bath. Everything was going fine ’till I stopped stirring to see if the cream had reached stiff peaks. By the time I got back to my gelatin it had set. I should have thrown it back on the still hot double boiler, melted it, and then chilled it more carefully, but I didn’t. I figured enough stirring and vigorous folding of whipped cream would do the trick. This was a bad plan. The gelatin mixture stayed in little boozy Jello clumps, and my whipped cream deflated. Because all the colour was in the Jello clumps the pie wasn’t looking very grasshoppery. I resorted to stirring in a few drops of food colouring, which solved things neatly.

I don’t think I could pick a favourite grasshopper pie of my life. There’s not much variation in the technique or the finished product. They almost inevitably taste great. Rich and creamy, with a boozy kick, and brisk hit of mint. The crème de cacao is there in the background, providing that hint of chocolate which works so well with mint.
Next time I’ll remember that gelatin is happy to set for a second time. However, despite my flub-ups, I was quite pleased with this pie. I had to want grasshopper pie for many years before I could try it, and then want to like it for a few more years, now I can say that it was worth the wait.

***ADDENDUM***

At my dining companion’s request, I made this pie again last night. I was very careful not to cool the gelatin mixture too much, and I took it out of the ice cube bath as soon as it began to thicken a little bit. When I mixed in the cream I had exactly the same issue as the first time, chunks of green gelatin in white cream. I solved the problem by putting the whole mess back in the mixer bowl and beating it on high for a minute. Grasshopper pie continues to be delicious, but I’m convinced that the recipe is flawed. I don’t want to start retroactively modifying my ratings, but I think we’re still within the 5 second rule for this post, so I’m downgrading this recipe from 4 to 3 mushrooms.

Categories
Sauces and Salsas The Book

134. Mayonnaise p.886


Surprisingly there’s no recipe on Epicurious for plain old mayonnaise.

This is The Book’s basic mayonnaise recipe, there are 7 other dressed up mayonnaises which use this recipe as a starting point, so I’ll be making it a bunch of times. As with most of the basic recipes in the book, it’s solid, but not exciting. However, that’s not a bad thing. I made the mayo recipe from the ’76 edition of The Joy of Cooking, and it was a disaster. Joy is often considered the home cook’s go to source for no-fail basic recipes, and you’d think they’d have a rock solid mayo method, but no. Mayonnaise is made by whisking an egg yolk with oil a drop at a time to get an emulsion started, then pouring in a staggering amount of oil in a slow stream while whisking madly. Once the mayo is thickened and the emulsion is no longer at risk of breaking, you can add extra flavourings. The crazy Joy method would have you add mustard, salt, cayenne, lemon juice, and confectioners sugar before you start the emulsion at all. The mustard is a common addition because it helps the emulsion form, but adding the lemon juice is just stupidity. The acid fights the emulsion you’re working so hard to build, why would you put it in there? I whisked for about 20 minutes before I could get a thin soupy consistency. It was an OK salad dressing, but a horrific mayo. The Book’s method is much more logical, and worked very well.

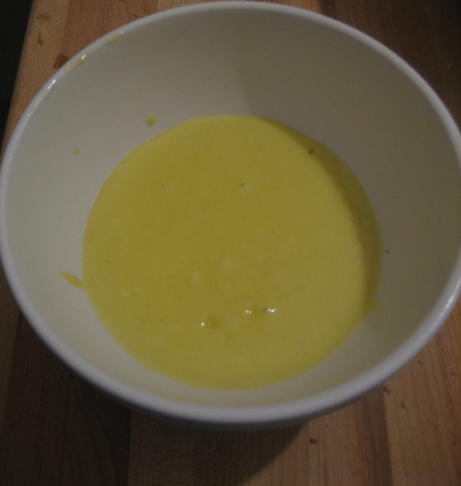
In this recipe an egg yolk is whisked together with Dijon and salt, then 3/4 of a cup of oil are added first by drops then in a slow stream. Once the mixture starts to thicken to the point that it’s getting difficult to whisk, and the emulsion is solid, you add a bit of white wine vinegar, and lemon juice. Then the remainder of the oil is added in a stream, and salt and white pepper are stirred in.

The mayo wasn’t quite as thick as I would have liked. You’d be better applying this with a spoon than a knife. But, it was silky smooth, and nicely glossy. I might have cut 1/2 a teaspoon of liquid somewhere to keep the mayo thicker. The flavour was pretty good, it had the eggy richness I look for in a mayonnaise, with a little bite from the vinegar and lemon juice, and a background body from the mustard. It was very nice spread on a sandwich, and quite a bit better than the the stuff that comes from a jar.

My only real complaint was the instruction to use either olive oil or vegetable oil in the recipe without further specification. Depending on your olive oil it can have a very pronounced taste, which is great for some applications, but it can make for a very weirdly flavoured mayonnaise. I made mayo at my brother’s place a few weeks back, and the only oil he had was olive, that mayo was edible, but none of us liked it much. It lacked the  mellow feeling I’m looking for in mayo, all of those grassy spicy flavours I enjoy in good olive oil where just unpleasant and distracting when they were so amplified. If you’re going to use all olive oil, I’d recommend using very mildly flavoured oil, preferably not extra virgin. I think the best tactic is to use a small amount of good olive oil for flavour, and then use a flavourless oil for the rest of it (canola, or grapeseed would be my first choices, using about 1 part olive oil to 3 parts other oil).

Mayonnaise is quite easy to make, and homemade has a definite edge over the store bought kind. I’ve always been disturbed by the fact that Hellman’s is made with real eggs, but keeps for months. Without all of the shelf-stable preservatives this mayo will only keep for two days. Since it’s really not much trouble to make, and it tastes better than the miracles of food science on the grocery shelf, I’ve been getting into the habit of making my own. This recipe uses a solid method, and it’s a jumping off point for a lot of interesting variations. It won’t blow your mind, and I’ve had better homemade mayo, but it’s worth trying at least once.

Categories
Breakfast and Brunch The Book

132. Blueberry Muffins p.641


The recipe

My dining companion has been doing a lot of driving for work over the past few months, and I’ve been looking for little treats that travel well to send along with her. These muffins looked like they’d fit the bill, and I was pleased to discover that they’re not just portable, they’re tasty. They’ve got another of Ruth’s seemingly unnecessary streusel toppings, but that’s not such a bad thing.

The recipe follows the standard muffin method, mix the wet stuff together, mix the dry stuff together, add the wet stuff to the dry stuff, and mix until it’s barely combined. In this case the wet stuff is played by melted butter, whole milk, egg, egg yolk, and vanilla, while the roles of the dry stuff are capably portrayed by flour, sugar, baking powder, and salt. Once the muffin mixture is together, the blueberries are delicately folded in, and the batter is divided into muffin cups. It then gets topped with a shortbread like mixture of flour, butter, and sugar. The muffins bake at 375 for 18 – 20 minutes.

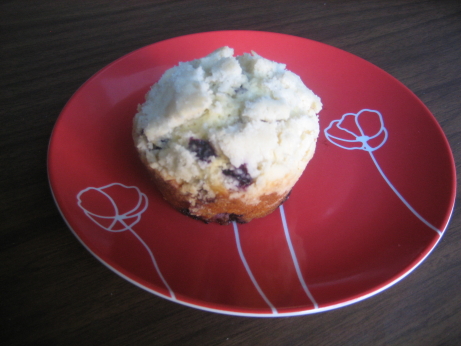
The muffins were very simply flavoured, rich and moist, with a carefully balanced sweetness that enhanced the blueberries. I like to give credit where credit is due, and this is one baked good where The Book got the sugar right. The topping was less successful, the recipe says to bake the muffins ’till they’re golden and crisp, but they were cooked through, and smelling done before the topping changed colour. If I’d waited any longer the undersides would have burned. I think there was just too much topping, so it was left a bit raw looking. It tasted quite good, but wasn’t as visually appealing as I would have liked.

This recipe gets nearly everything right, good texture, clean flavours, satisfying richness, and a wallop of blueberry essence. Unfortunately the undercooked topping takes away from the effect. I’d certainly make these again, but I’d use half the topping, or omit it entirely. It did lend a nice contrasting texture, but the “studies in white, number 6” vibe didn’t do it for me. Overall quite a nice muffin though.

Categories
Breakfast and Brunch The Book

128. Streusel-Sour Cream Coffee Cakes p.645


Unfortunately there’s no recipe online.

The Book has a deep and abiding affection for streusel-toppings. I suspect that if the cooks at the Gourmet test kitchen leave their batter alone for too long, they’ll find that Ruth Reichl has snuck in and covered it in streusel. I don’t particularly have anything against streusel toppings, they add a nice textural contrast, but they tend to be very sweet. If the underlying baked good didn’t already have 30% more sugar than it needed, that could be a nice addition, but here it struck me as trying to gild the already candied lily.

The recipe starts by blending brown and white sugar with flour, salt, and butter. The streusel topping is made by separating out some of this mixture and working in cinnamon, additional butter, more brown sugar, and chopped pecans. A mixture of sour cream, egg, egg yolk, vanilla, baking soda, and orange zest is incorporated with the remainder of the flour-sugars-butter mixture, then divided up into 18 muffin cups, topped with the streusel, and baked.

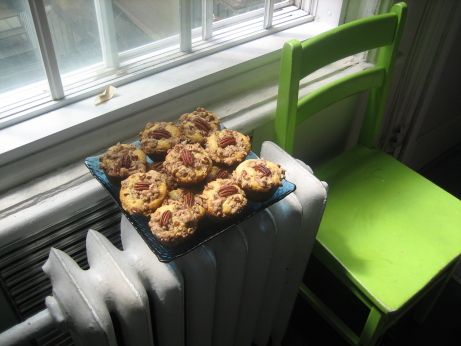
There are a lot of things I liked about this recipe, but as is often the case The Book went overboard on the sugar (1 3/4 cups of sugar to 2 1/2 cups of flour). The cakes were rich, dense, and moist, with a soft slightly elastic texture. The orange zest in the cakes was an excellent touch. The topping was double extra sweet, but I really liked the complexity the pecans and molasses in the brown sugar brought to the cakes. I wish that the recipe had less sugar, and more nuts. Keeping the nuts out of the cake batter highlighted them and broke up the uniformity of the muffin. Unfortunately the streusel topping had a habit of falling off. Next time I’d be more careful about pushing the topping down into the batter.

This recipe is found in the Breakfast and Brunch chapter, but these cakes might work better with afternoon coffee, or as a dessert. They were a bit much for breakfast. I brought these over to a pot-luck brunch, to positive reviews, but they didn’t really do it for me. The next day I had one with an unsweetened espresso, and found I liked them much better. The concept and flavours are solid, and the bitter coffee provided some much needed contrast.

Categories
Pies, Tarts, and Pastries The Book

123. Sweet Pastry Dough p.791


The recipe

I should state at the outset that I’m a pastry neophyte. Before I started The Project, I think I’d made two pies in my life. Sure, I baked stuff in pie shells, but I always picked up the Tenderflake pre-made ones, and figured it was good enough. I don’t really have a knack for pastry, but I’m working on it. This is the inaugural entry for the Pies, Tarts, and Pastries chapter of The Book, so hopefully my pastry skills will improve as I work my way through it.

This pie dough is a sweetened and butter based. It gets used in all sorts of other recipes in The Book. I definitely prefer a sweetened dough for dessert pies and tarts. My mother is a rolling pin virtuoso whose pies always turn out perfectly, but she uses the same lard based dough for all her recipes. We have tourtière (a spiced meat pie) every Christmas, which I adore. I particularly like the way the crust is infused with the meaty filling’s flavour. However, when summer comes around and she starts baking up fruit pies using the same dough, I can’t help but imagining the taste of the meat filling along with the crust. Tourtière innards and strawberries aren’t destined to be the next great taste sensation. She recently started adding sugar to her dough for sweet pies, and it made a world of difference. Somehow a little sugar gets rid of the yuletide association, and the pies become pure summer.

The ingredients and method for this dough are pretty standard, combine flour, sugar, and salt, then blend butter in until you’ve got pea sized lumps in a sandy mixture. Then egg yolk and a bit of water are incorporated, until the dough barely holds together. The dough is then divided up, smeared once with your palm, and refrigerated for an hour.

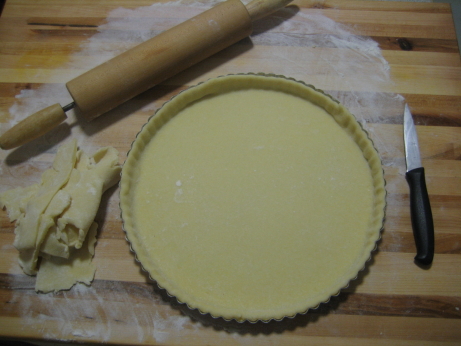
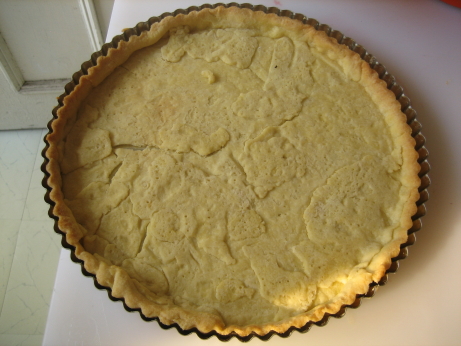
I had some trouble with rolling this dough out. I’ve made it twice, the photo above is the most recent attempt. You can see the scraps to the left, which were probably 40% of the pie dough. I had a really tough time getting it to roll out evenly, and small cracks at the edges developed into big fissures as I was rolling. It was actually fairly easy to work with, and I think my problems were a matter of technique rather than the recipe. The first time I made it was much more of a fiasco though. I made it in late August, on a day with 95% humidity, and it didn’t go so well. Here’s a photo of the crust after baking. 123_sweet_pastry_dough_p791_bad_attempt.jpgYou can see that I had to do a lot of patching before I even got the dough into the oven, and small cracks I’d missed developed into chasms once baked.

The flavour of the dough is excellent, but the texture isn’t ideal. Butter doughs are usually tender, but not flaky. Using a mixture of lard or shortening with butter should give a flavourful dough with great texture. The Book’s Basic Pastry Dough takes this approach (without sugar), and I’m looking forward to trying it. This dough was perfectly fine, it tasted good, and the texture was totally acceptable, but I don’t think it’s the definitive sweet pastry dough. Perhaps as I make and remake it for all the recipes that call for it I’ll get the technique down. For now it’s very serviceable, and I’m content to keep using it.

Categories
Poultry The Book

98. Chicken Fricassee p.372


No recipe this time.

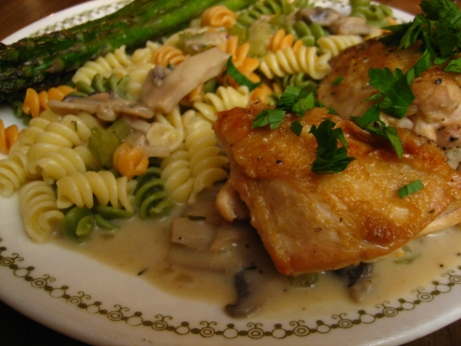
This was a fairly successful and simple recipe. It’s real comfort food, chicken in a creamy mushroom sauce served with noodles. Like most comfort food it’s fatty and a bit bland. The preparation was as simple as you could wish for. Break a chicken down into serving size pieces, and brown them in a skillet. Remove the chicken and make a sauce of onion, celery, garlic, thyme, mushrooms, and chicken stock. The chicken is added back in and simmered ’till it’s cooked through. Then the remaining sauce is bolstered with heavy cream and an egg yolk.

I often complain about chicken skin and wet cooking methods. The skin tends to turn into a gross mush. In my opinion there’s no point in eating the added fat of chicken skin unless it’s crispy. This is a wet cooking method, but the skin managed to retain at least a bit of texture, and loads of flavour. The chicken parts are simmered in the sauce, but only the bottom halves are covered. The skin gets steamed, but not bathed in liquid, so the caramelization you built stays in one place.

The sauce worked really well on the pasta. The sauce actually had more chicken flavour than the chicken did, and the cream and egg yolk gave it a really silken texture which coated the noodles perfectly. I ate some of the chicken, but the dish was really all about the pasta and sauce for me. The thyme and mushroom flavours were prominent, fortunately that’s a great flavour combination. I found the first few bites bland, but the addition of a good dose of fresh ground black pepper picked things up quite a bit. I sprinkled Parmesan on some leftover noodles the next day and they were even better.

This dish had very straightforward flavours, it hit all the marks of a crowd pleaser. It has the added advantage of not containing anything people really object to (except celery, but that’s just me). It tasted good, but it wasn’t really inspired, or particularly interesting. I guess you can’t have it both ways. I would have preferred something a little more novel. Combining loads of carbs, a healthy dose of fat, the unobjectionable flavour of chicken, and some pantry staple spices is a no brainer. This dish would fit in well on a family restaurant’s menu. This kind of comfort food isn’t actually the stuff I crave after a bad day, but TV tells me this is what people want when they’re upset. It tasted good, but it wasn’t really memorable.

Categories
Soups The Book

28. Rustic Garlic Soup p.94

Sorry, no recipe this time.

This is an Italian soup called aquacotta or “cooked water”, because it comes together from nothing special. It starts with a garlic broth (water, garlic, thyme, bay leaf, and salt) which is forced through a sieve, and slowly added to a mixture of egg yolks, parmigiano-reggiano, and olive oil. Add pepper, and spoon it over some chunks of country style bread. I wanted to make it more of a meal so I browned some cheddar on the bread under the broiler and added it to the soup.

This recipe really appealed to me because I’d invited a friend over for supper, but when I got home from work I just couldn’t face going to the grocery store. I loved that it didn’t require anything I didn’t have on hand, and that it hardly took any effort. The garlic broth worked out really well, giving the soup a pungent flavour, without the same old same old of chicken stock.

The egg yolks gave the soup a bunch of body. The recipe says only to stir the hot broth into the egg mixture slowly, but it would probably be a good idea to take the time to temper the mixture before you start adding in a stream. Coagulating your yolks wouldn’t be good news for anyone.

Most of the saltiness came from the cheese, which was nice. Not too many soups call for cheese in such a nice proportion. I appreciated that the cheese was a nice flavouring agent, without being the star. My cheddar topped toasts didn’t work too well as a replacement for the bread chunks. They floated to the top, and ended up looking a bit sickly. Also one of the best things about cheese on toast is the contrast between the gooey cheese, and the crisp toast. That’s obviously a non-starter when your toast is floating in soup. I wish I’d just stuck to the recipe as it was, or served them on the side.

Overall I liked this one, it was simple, flavourful, economical, and not much fuss.