Categories
Breakfast and Brunch The Book

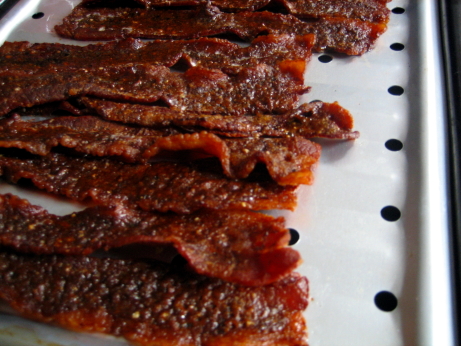
169. Sweet and Spicy Bacon p.656


The recipe

The food blog world has been swamped with recipes for caramelized bacon with a kick, so I decided that now would be a good time to see what all the fuss was about. After trying this recipe I’ve decided it’s just a gimmick, and not a worthy treatment of bacon. I get the concept, and can see the appeal, a dish that’s simultaneously sweet, smoky, salty, and spicy could be the holy grail of addictive breakfast treats. Alas, that’s not how this dish turned out.

The method is simple, but just because it’s easy to do a thing, doesn’t mean you should. You cook thick-cut bacon on a broiling rack in a 350 oven for 20 minutes, flip it over, and spread on a mixture of brown sugar, cayenne, and black pepper, then continue baking for another 15-20 minutes.

In re-reading this recipe I realize I missed the whole thick-cut bacon instruction, and used the normal stuff. That meant that my cooking time was significantly shorter, and I had proportionally more of the sugar-spice mixture than the recipe intended. Consequently my bacon was sweeter and spicier than it should have been. I think I’ve decided that any amount of sugar and spice on my bacon is too much. The flavour wasn’t bad precisely, it still tasted like bacon, but my palate had to filter out distracting brown sugar and cayenne flavours to get to it. Most of my guests thought it was sort of OK, but one just hated it, I think he found this dish personally offensive.

If there’s one thing the internet doesn’t need it’s another ode to bacon, but it’s pretty well understood that bacon is near perfect all on its own. You can use it to make other dishes better, but trying to improve the bacon itself is a fool’s errand.

Categories
Food Blogs The Project

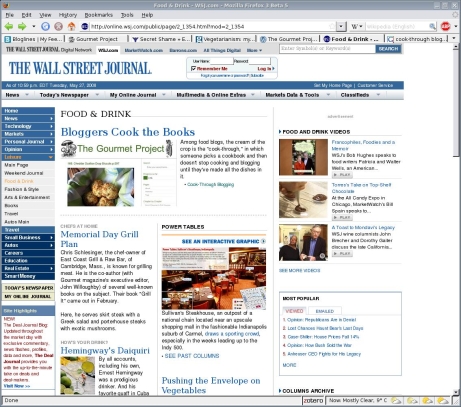
The Gourmet Project in The Wall Street Journal

Extra Extra! There’s an article about cook-though blogs like this one in today’s Wall Street Journal. There’s even a quote from me in there. This is the first mainstream media attention The Project has attracted, and I’m honoured to have it come from such a prestigious publication. You can access the article through the WSJ website, there’s also a page of links with excerpts from the cook-through blogs profiled. I discovered a bunch of amazing new blogs, it’s well worth a look.

Categories
Breads and Crackers The Book

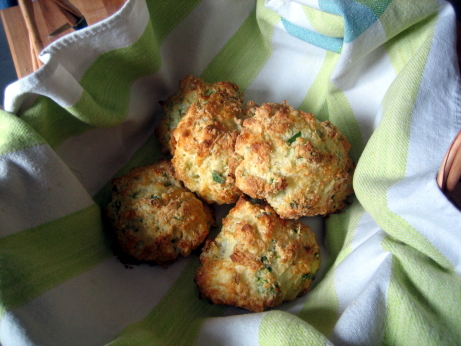
168. Cheddar Scallion Drop Biscuits p.597

The recipe

The Boys were over for breakfast, and I decided to make them biscuits. One of them has been living down in the Carolinas for the last few years, and has become something of a biscuit connoisseur, so I didn’t dare try a traditional buttermilk biscuit. These are far simpler, and less error prone. It’s a basic biscuit dough (flour, baking powder, baking soda, salt, butter, buttermilk) with a bit of sugar, cheddar cheese and scallions mixed in. These aren’t kneaded or shaped which when done wrong can toughen the biscuits, they’re not cut out so there’s no risk of collapsing the flaky layers, and there aren’t twenty generations of ancestors looking over your shoulder to make sure you do it exactly right. You just blend butter into the dry ingredients, stir in the cheese and scallions, and barely mix in the buttermilk (gluten is still your enemy). The biscuits get unceremoniously dropped onto a baking sheet, and stuck in the oven.

As Epicurious posters have noted, the cooking time is off, at 450 these will be burned after the recommended 18-20 minutes, I started smelling a hint of char from the bottoms after 14-15 mintues. so don’t get too far from the oven, and use your nose.

They tasted a lot like the biscuits at Red Lobster. I don’t think I’ve been to a Red Lobster since 1998, but the taste of their biscuits is stuck in my food memory. They’re less over the top greasy (which unfortunately means not quite as good), in fact they’re a little dry. A bunch of the Epicurious posters recommended adding more buttermilk, and I think I’d go with that suggestion next time. The cheese flavour is prominent in these biscuits, I used some middle of the road aged cheddar, but I’d definitely choose the oldest sharpest stuff I could get my hands on next time, the cheese is the make or break ingredient, so choose it wisely. I really liked the addition of scallions, the onion flavour wasn’t overwhelming, or un-breakfasty, just delicious. The exteriors of these biscuits were glossy and crispy, and while the insides were a bit dry once they’d cooled, they were lovely and tender when warm. The solution is obviously never to let these cool down.

These biscuits were a success, they’re fairly idiot proof, so I can handle making them before the espresso machine has heated up. The ingredients are mostly things you’ll have on hand (or maybe normal people don’t absolutely always have scallions in the fridge, but that’s just semantics), they taste good, and look pretty. While the recipe has a few problems, with a couple modification I think they could be a breakfast standby.

Categories
Puddings, Custards, Mousses, and Souffles The Book

167. Crème Citron, Chilled Lemon-Wine Mousse with Raspberries p.840

There doesn’t seem to be a recipe online for this one.

My dining companion has gone on a major citrus based dessert kick. If we’re flipping through the book talking about a menu, she’ll inevitably pick a lemon flavoured confection. The only things that can top lemons and limes in her books are rosewater and lavender based sweets. That’s fine by me, I certainly like lemony desserts as well, but I fear The Book will run out of them and it’ll be nothing but raisin puddings until 2016.

This was a really nice, and simple custard, lightened with whipped cream. It starts with eggs beaten with sugar, then dry white wine and lemon juice are added, and the custard is slowly thickened. once it coats a spoon it comes off the heat, gets an addition of lemon zest, and is allowed to chill in the fridge. Meanwhile you beat cream, and fold it into the chilled custard. The custard is layered with berries in a wine glass, and allowed to chill for an hour before serving.

I was really happy with the way this dish turned out. I don’t have a heck of a lot of experience with making custards, and I think I overheated mine a bit. I had trouble taking an accurate temperature, and a burned my finger trying to decide if it was nappe yet, but otherwise things went smoothly. The wine was the killer addition to this crème, it had its sweet, rich, and creamy, bases covered but the wine gave it some complexity and body. You can really taste the wine here, so I’d pick something decent, and very dry. The custard ended up being a touch too sweet for my taste, but overall it was very good. Berries for dessert are always such a treat, and they’re even better when the come with an elegant custard. Whipped desserts like this are a great way to end a heavy meal, or to serve on a hot summer night. It tastes rich and satisfying, but it’s not actually that filling.

The recipe made five portions, and we each had one the night we made them. Although we both liked them, neither of us when back for the leftovers, and we eventually threw them away. Sometimes that will happen to me with very intense desserts, that are wonderful, but after a few bites I’m just done for the next couple of months. In this case, the dessert was light and airy, so I’m not sure why I didn’t want it more. Although, I suspect that if I’d served this on a sticky night in July with burstingly ripe berries it would have been a lot more craveable.

Categories
Breads and Crackers The Book

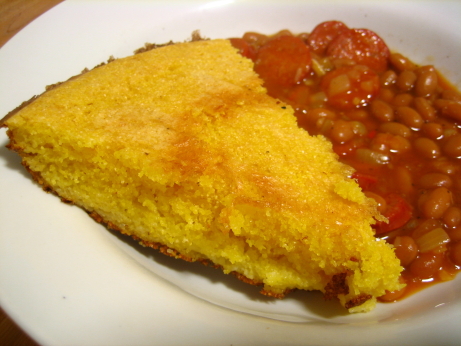
166. Skillet Corn Bread p.600

The recipe in The Book is identical to this one on Epicurious, but The Book adds a tablespoon of sugar to the corn bread.

The desire to make corn bread comes in waves for me. Six months will go by, and I won’t even think of it, then I’ll get the urge, and make it three times in a week. I like to play with my recipes, and improvise. The first batch of the week is usually pretty straightforward, in a baking pan, hardly sweet, good with gravy. Then I get stupid and try putting things that shouldn’t go into corn bread into my recipe. I’ve never once liked the cheese or sausage corn bread I’ve made, and I don’t particularly like corn bread muffins, I should just learn my lesson. I make the third batch to redeem myself. By this point I’ve remembered how much I like leftover corn bread for breakfast, and that I really like it warmed for a few seconds in the microwave, with a bit of butter, and a drizzle of maple syrup. I substitute maple syrup for the sugar in the recipe, and add a bit of extra butter directly to the batter for the week’s final batch, and I am usually well pleased. By the time we’ve finished that pan, I’m so ODed on corn bread that I can’t look at it for another few months.

This recipe takes the unusual step of omitting the flour that’s in most corn bread recipes, it’s all cornmeal. That makes the bread more coarse and granular, and less cake-like. The nice thing about corn bread is that it’s fairly idiot-proof. You just whisk together the dry ingredients, gently stir in the wet ingredients until it’s barely combined, and bake. This bread is baked in a preheated cast iron pan, and the butter that goes into the bread is melted in the pan first, this leaves you with a browned butter coating in the pan, which tastes nice, and helps keep the bread from sticking. The recipe uses the muffin method, of barely combining the wet and dry ingredients, which is usually done to prevent gluten from forming, and making a baked good tough. In this case there’s no flour, so I can’t see why you shouldn’t beat the tar out of it.

This was perfectly fine corn bread, I liked the cast iron skillet method which created a very nice deeply browned crust. This was a dryer style of corn bread than I prefer, and even with the tablespoon of sugar, I would have liked a bit more sweetness. I found it a bit crumbly, and missed the soft texture of a flour based corn bread. There was absolutely nothing wrong with it, and it’s probably somebody’s favourite style. As a recipe I think it worked quite well, I just wasn’t totally on board with what it was trying to do.

Categories
Cookies, Bars, and Confections The Book

165. Chocolate Macaroons p.676

I can’t find the recipe for these online, but they’re so good I’ll retype it for you lovely people.

FOR MACAROONS

1 1/3 cups (7 ounces) skinned whole almonds

3 1/2 cups confectioners’ sugar

1/3 cup unsweetened Dutch-process cocoa powder

7/8 cup egg whites (from 6 large eggs)

pinch of salt

1 tablespoon granulated sugar

FOR GANACHE FILLING

1/2 cup heavy cream

2 teaspoons whole milk

2 1/2 tablespoons unsweetened Dutch-process cocoa powder

4 ounces good bittersweet chocolate, finely chopped

1 stick unsalted butter, cut into 1/2 inch pieces

SPECIAL EQUIPMENT: Parchment paper; a pastry bag fitted with a 1/4-inch plain tip

MAKE THE MACAROONS: Put a rack in middle of oven and preheat oven to 400F. Line two large baking sheets with parchment paper.

Pulse almonds with 2 cups confectioners’ sugar in a food processor until finely ground (almost to a powder). Add cocoa and remaining 1 1/2 cups confectioners’ sugar and pulse until combined.

Beat egg whites with salt in a large bowl with an electric mixer at medium-high speed until they hold soft peaks. Add granulated sugar and beat until whites just hold stiff peaks. Gently but thoroughly fold in almond mixture in 3 batches (batter will be very soft).

Transfer batter to a pastry bag and pipe 1-inch-wide mounds about 2 inches apart on lined baking sheets. Bake macaroons in batches until tops are slightly cracked and appear dry but are still slightly soft to the touch, 8 to 10 minutes per batch. Transfer macaroons, still on parchment, to dampened kitchen towels and cool for 5 minutes, then peel from paper and cool completely on racks.

MEANWHILE, MAKE THE GANACHE FILLING: Bring cream and milk to a boil in a small heavy saucepan over moderate heat. Whisk in cocoa and remove from heat. Add chopped chocolate and butter and stir until smooth. Cool filling, then refrigerate, covered, until firm enough to hold its shape when spread, about 30 minutes.

Sandwich flat sides of macaroons together with 1/2 teaspoon filling per pair.

COOK’S NOTES

  • While 7/8 cup egg whites may seem and odd measure, this amount gives the ideal texture and flavour. Measure the whites in a liquid-measuring cup.
  • The macaroons can be made up to 1 day before you fill them. Refrigerate, layered between sheets of wax or parchment paper, in an airtight container.
  • The filled macaroons keep, layered between sheets of way or parchment paper in an airtight container and refrigerated, for up to 1 week.

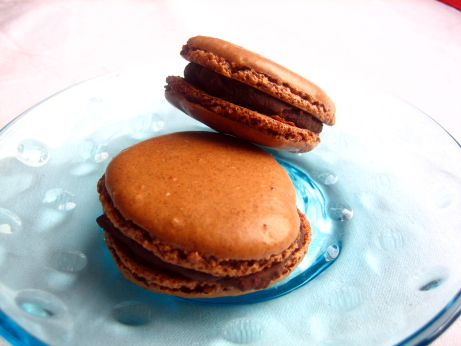
I don’t have enough good things to say about this recipe. The cookies were delicious and elegant. The recipe makes a lot of cookies, so I brought them to several gatherings, always to rave reviews. The chocolate filling is wonderful, and everyone loves ganache, but the cookie itself was my favourite part. I really like flourless cookies like this, the almonds provide substance, but the structure is all from the meringue. The outer surface of the cookie was smooth and crisp, the interior was like almond sponge candy, soft, but with just a little bit of toothsomeness. Despite all the sugar, they miraculously avoided being too sweet.

My only bone to pick with this recipe, is the use of the word macaroon in the title. A double O macaroon is an American coconut cookie, a single O macaron is a French almond cookie, get it straight Gourmet. These were truly excellent cookies, they were a bit time consuming and finicky, but I enjoyed the process. The recipe was well written and didn’t lead to any major surprises. My only caveat is to make sure to grind the almonds very finely, otherwise they’ll clog up the tip of the pastry bag when you’re piping the cookies.

A while ago my brother brought me some Macarons from a very posh bakery in Paris, and while theirs were certainly prettier, I preferred the flavour of my homemade version. These macarons are my new favourite cookie, and I expect them to be on frequent rotation in our house.

Categories
Beef, Veal, Pork, and Lamb The Book

164. Beef Bourguignon p.440

The recipe

I grew up on boeuf bourguignon, we could be guaranteed to have it at least once a month during the winter. Since a braised dish like this is better a day or two after it’s cooked, my mom would usually make it on a Sunday, and it would sit on the chilly garage floor in her big orange Le Creuset Dutch oven until dinnertime on Tuesday. I remember being very small, and being tasked with bringing the stew upstairs, I swear that cast iron pot weighed more than I did, and it was so cold it burned. Since a bottle of wine goes into a boeuf bourguignon, and even after a long braise not all of the alcohol cooks off, I’m wondering if this dish didn’t contribute to some of excellent sleeping we got done as kids.

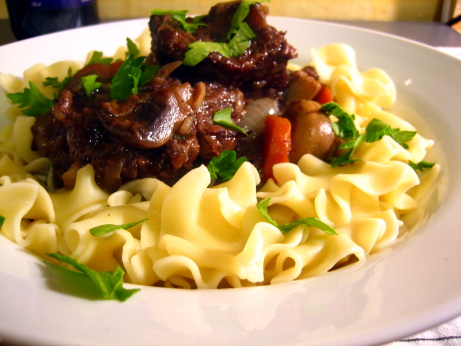
The recipe starts with some home butchery, getting beef shoulder off the bone, and cubed. The cubes are then seasoned, coated in flour, and thoroughly browned. The meat then braises for an afternoon with sweated onions, garlic, and carrots, tomatoes, red wine, and a bouquet garni. While that’s going on you get to blanch and peel boiling onions. I hate peeling boiling onions, but I did it anyway. The onions then get browned with some butter, and simmered until tender. You then sauté some mushrooms in butter, and add the mushrooms and onions to the braise, and let it simmer for a few minutes. Once everything’s done cooking you can eat it right away, or better yet stick in in the back of the fridge and forget about it for a couple of days. The Book recommends serving this dish with buttered potatoes, but I’ve always been a fan of egg noodles with boeuf bourguignon, so that’s what we had.

There’s an error in this recipe. The first ingredient listed is a quarter pound of bacon, and the fist cooking direction is to simmer the bacon in water for a few minutes. That bacon is never mentioned again. The linked Epicurious recipe has the error fixed, you’re supposed to crisp up the bacon in the pot before starting the braise, but it’s mystery bacon if you follow The Books version. I guessed that it was meant to go into the braise, and that worked out well, but I hope they’ve caught this mistake in the updated version of The Book.

I was entirely satisfied with this dish, it tastes just like what mom used to make, it’s hearty, rich, stick to your ribs, winter cooking. The flavours were right on, this is not a difficult dish to get close to right, but making it really well is a challenge. This is a really solid boeuf bourguignon recipe, my only complaint is that it was a bit too salty. I’ll certainly be making this one again next winter.

Categories
Fish and Shellfish The Book

163. Grilled Tuna with Warm White Bean Salad p.299

The recipe in the book is similar to this one on Epicurious, except that the book calls for larger (6 oz) tuna steaks.

This dish was a triumph. As I’ve mentioned before my dining companion isn’t a fan of fish, and the book has 95 Fish and Shellfish recipes for us to get through. While she’s open to trying new things, and always tells me she’ll try whatever I make, I want to make her happy, so I’ve been staying away from fish when she’s around for supper. I decided that barely seared tuna would probably be an easy way for her to dip a toe into fishy waters without being overwhelmed. We’ll work our way up to mackerel and cod, but this was a successful baby step.

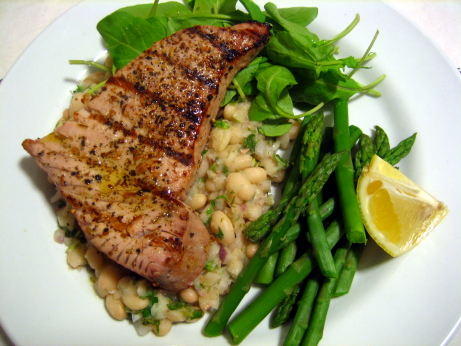
The dish has two components, grilled tuna steaks seasoned with lemon juice, olive oil, crushed fennel seeds, salt, and pepper, and a bean salad. The salad is made with soaked great northern beans, which are simmered with garlic for an hour. Some of the beans are mashed and combined with the beans’ cooking liquid to hold the salad together, fresh garlic is added in, along with chopped arugula, onion, parsley, lemon juice, olive oil, salt and pepper. The tuna is served on top of the beans, and some of the remaining arugula.

I was really happy with this dish, it was simple, clean, and very tasty. Mostly I was happy that my dining companion was happy though. Our grill heats quite unevenly, so some parts of the tuna steaks were more done than I would have liked. My dining companion liked the barely cooked parts of the tuna, but found the overdone bits too fishy for her taste. I thought the fennel worked exceptionally well with the tuna, and I’d absolutely grill steaks like this again. I’d probably try to sear the steaks over an extremely hot flame for just a couple of minutes though, if you’re using high quality tuna, and paying high quality tuna prices, getting a seared exterior, and a barely warm interior is important. The bean salad wasn’t as successful, but not bad at all. The beans needed more garlic, and more salt or lemon juice, they were a little on the bland side. The texture was nice, with just barely firm beans, in a thick sauce. The decision to put chopped arugula into a warm dish is mystifying though. Arugula’s claim to fame is it’s peppery crisp flavour, and that completely disappears the second you heat it. A few of the Epicurious comments suggest that the dish would be better with spinach, and I’m inclined to agree.

I thought this was a really nice dish, it came together easily, tasted good, and managed to do it without dousing everything in cream and butter. It’s the kind of dish that begs to be eaten outside on a beautiful spring day with people you really like. I’ll always remember this dish as the first time my dining companion ate and enjoyed fish for dinner.

Categories
Soups The Book

162. Onion Soup Gratinée p.114

I can’t find a recipe for this soup online.

Typically onion soup is a socially acceptable excuse for sitting down to half a pound of melted cheese. Trying to maneuver those long strands of gooey cheese into ones mouth without getting it all over your front is a social bonding experience best shared with close friends. If you ask people what they like about onion soup they’ll probably say it’s the cheese. This recipe takes the radical position that the cheese is just getting in the way of a really good soup.

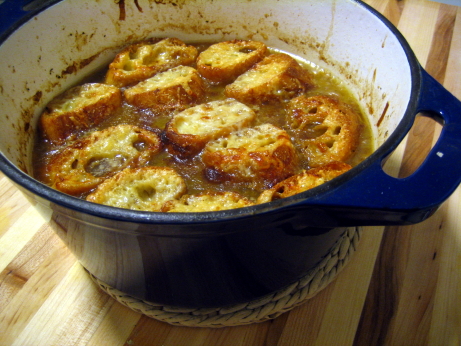
This recipe uses the Beef Stock from last time as its main ingredient, along with caramelized onions, vermouth, a bouquet garni, cognac, and Worchestershire sauce. It’s topped with toasted baguette slices, and a thin layer of grated Gruyère and Parmigiano-Reggiano, then popped under the broiler for a bit. The end result is a nice onion soup, but it’s lacking in the cheese department. I agree that sometimes the cheese can be overwhelming, but half the joy of onion soup is the melty strands of cheese that come up with every bite. The soup itself was a little heavy on the booze and Worchestershire sauce, and not as onion flavoured as I would have liked. As I mentioned last time, making the stock for the dish was a big pain, and didn’t have a great pay-off. It was a perfectly fine basis for the soup, but it was hardly better than the store bought stuff.

While I enjoyed my dinner, there are better onion soup recipes out there. My dining companion makes French onion soup often enough, it takes her twenty minutes, and tastes far better than this all day affair.

Categories
Basics The Book

161. Beef Stock p.928


The recipe

I can’t escape the conclusion that I’m a food snob. I take satisfaction in looking down on packaged and processed foods, and I give people points for making meals from scratch, double points if the ingredients come from an ethically superior source, and triple points if they grew the food themselves. The ultimate ridiculousness of snobbishness is that no one can live up to the standards they judge others by. I enjoy pickling my insides with Doritos, I pay outrageous prices for a tiny package of hummus that I could make at home for twelve cents, and I don’t find that organic vegetables taste better than their fertilizer drenched cousins. My ultimate sin though, is that I don’t make my own stock.

Stock making and apartment living aren’t an obvious combination. Making stock takes most of a day, so you’ll want to make up a big batch. That’s well and good if you’ve got a spare freezer in the basement, but our tiny freezer is spilling over with leftover ravioli, pesto ice cubes, and pork tenderloin that went on a crazy sale. There’s just no room for three liters of stock. The food network has filled hundreds of hours by having famous chefs repeat the refrain that the biggest reason the professionals’ food tastes better than home cooks’ is that they make their own stock (and use unconscionable amounts of butter). The sin that will get me kicked out of the food snobs annual picnic is that I don’t think that store bought broth is all that bad, in fact I like it. It’s convenient, perfectly servicable, and unless you’re using it as a gigantic component of your dish no one is going to be able to tell the difference. You usually have to reduce the salt in the rest of the recipe, because even “low sodium” broth isn’t all that low in sodium, other than that store bought broth is perfectly fine, and not at all a pain in the ass.

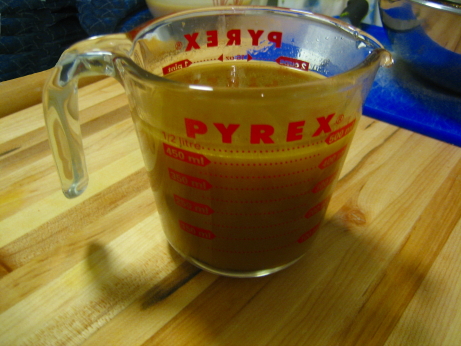
Making this stock was a pain in the ass. It’s not actually difficult, but it’s messy and takes six and a half hours. Your day starts with a trip to the butcher, who is happy to provide meaty beef and veal shanks, but thinks you’re an idiot when you ask him to saw them into one inch slices. He’s been making stock his whole life, and doesn’t think this step is necessary. He’s old and Italian, so he’s probably right. You then bike home with a plastic bag full of chopped up bones hanging from your handlebar, and dump them into a roasting pan along with some carrots and onions. Roast this mess, stirring occasionally for an hour at 450. Stop cursing Ruth Reichls name, because the house is starting to smell pretty good. Make a bouquet garni by tying parsley, thyme, and a bay leaf in cheesecloth. Start cursing Ruth again, because you’re going to be running the stock through a fine mesh sieve later on, and a bouquet garni is totally unnecessary. Transfer the roasted bones to a stockpot. In transferring them drop several meaty bones on the floor, this is interesting for the cat, but annoying for you. Deglaze the roasting pan, and transfer the scraped up brown bits to the stockpot along with celery, the bouquet garni, and water. Bring it to a boil, and spend half an hour skimming the nasty meat froth that rises to the surface. Disgust your girlfriend by sneaking up on her with the meat foam while she tries to read the paper. Let the stock reduce for 3 to 5 hours. Don’t leave the house, because that’s a fire hazard. Break up the monotony by skimming more foam every once in a while. Once you’ve got 8 cups of liquid left, fish out all the bits of bone and mushy vegetables, and get rid of them. Then try to set up a sieve over another big pot, and pour the stock through the sieve. Mess this up, and have the sieve fall into the filtered stock. Do it all again. Touch the hot stockpot and burn yourself. Swear for a while. Do a side to side comparison of your stock to Campbell’s low sodium beef broth, and realize that they’re really not that different. Swear some more.

This tastes like tetra-packed beef broth from the store, only it takes a long time. Homemade does have more gelatin in it, so it has a richer mouth feel, but I’m sure blooming an eighth of a teaspoon of gelatin in store bough broth would nullify this difference. Final verdict, totally not worth it. I used it as the basis for French Onion Soup, which specifically calls for making this stock, and suggests that it won’t be nearly the same with store bought, but frankly the stock wasn’t amazing in the soup. Maybe there are beef stock recipes out there that will blow the cheap, readily available, and very convenient competition away, but this is not one of them.